Saving Seeds From Your Garden
Late summer is seed-saving season. Which plants are worth saving from, how to tell seed is actually ripe, and how to dry and store it so it still germinates next spring.
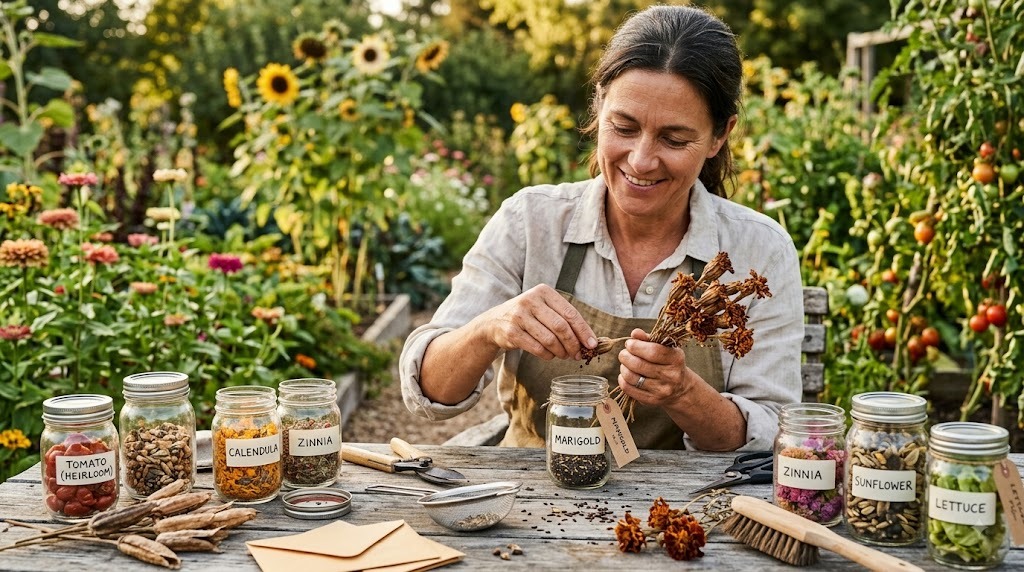
Save seed from open-pollinated plants, let it ripen fully on the plant, dry it hard, and store it cold, dark and dry - that is the whole method in one line. The parts people get wrong are the first and the second. Seed from an F1 hybrid will grow, but it will not grow the plant you liked, and seed picked while the pod is still green will rot in the envelope or simply fail to sprout. Get those two right and the rest is patience and a paper bag.
Mid-August to late September is the window for most gardens in temperate climates. Annuals are finishing, seed heads are browning, and there is a short period where seed is ripe but has not yet scattered itself into the lawn. Miss it by ten days and the plant has done the job for you, in the wrong place.
Which plants are worth saving from
Not everything in the garden is a good candidate, and knowing which is which saves a season of disappointment.
Reliable: open-pollinated and heirloom annuals. Marigolds, calendula, nigella, poppies, sunflowers, cosmos, sweet peas, nasturtiums, honesty, and self-seeding coneflower types all come back close enough to the parent to be worth the effort. Peas and beans are the easiest of all - big seed, dry pods, almost no processing.
Unreliable: anything labelled F1. F1 hybrids are the first-generation cross of two fixed parent lines, and their offspring scatter back into that ancestry - taller, shorter, paler, less vigorous, all in the same row. If the packet said F1, treat the plant as a one-season plant.
Complicated: anything in the squash and brassica families, which cross enthusiastically with their relatives nearby, and most biennials, which will not set seed until their second year. Herbs sit in between - basil and dill set seed freely and come reasonably true, while many named rosemary and lavender cultivars are propagated from cuttings for exactly this reason.
Not worth it: most houseplants. Indoor plants rarely set viable seed without a pollinator, and the ones that do take years to reach any size. Division and cuttings are far faster - our guide to propagating houseplants covers the methods that actually work indoors.
How to tell seed is genuinely ripe
The single most common failure is harvesting early. Seed continues to mature on the plant right up until the pod or head dries, and green seed has neither the food reserve nor the hardened coat it needs.
Look for these signals:
- Pods and capsules turn from green to tan, brown or papery and rattle when shaken.
- Seed heads go dry and brittle, and the seed detaches with a light touch rather than a pull.
- Fleshy fruits go past ripe - the seed inside is mature only when the fruit is fully coloured and soft, well beyond the picking stage.
- The plant starts scattering. If you find seed on the soil below, you are at the end of the window, not the start.
The practical trick is to tie a paper bag loosely over two or three of the best seed heads once they start to colour, and leave them on the plant. The bag catches whatever drops, the seed finishes ripening where it should, and you stop having to check every day.
Choose the parent plant deliberately while you are at it. Save from the healthiest, best-shaped, most productive plants - not the sad one you were going to pull anyway. Saving seed is selection, whether you think of it that way or not, and doing it carelessly for a few years shows.
Cleaning: dry seed versus wet seed
Dry-seeded plants - most flowers, peas, beans, poppies, herbs - are simple. Bring the heads in on a dry day, spread them on a tray or newspaper somewhere warm and airy for a week or two, then crush or shake the seed free. Separate seed from chaff by tipping the mixture gently between two bowls in front of a fan or an open window on a still day; the chaff blows off, the heavier seed stays. Perfect cleanliness is not required, but plant debris holds moisture, and moisture is what kills stored seed.
Wet-seeded plants - tomato, cucumber, squash - need the pulp removed. Scoop seed and gel into a jar, add a little water, leave it at room temperature for two to four days until a layer forms on top, then pour off the floating debris and hollow seed, rinse the good seed that sank, and spread it thinly to dry. Do not dry seed on paper towel; it welds itself on. A ceramic plate or a fine mesh screen works far better.
Dry until seed is properly hard. A ripe bean should be impossible to dent with a fingernail; a small seed should snap rather than bend. Anything still leathery goes back on the tray. Never dry seed in an oven or in direct sun on a windowsill - heat above roughly 35°C damages the embryo, and a sunny sill in August gets well past that.
Storing so it still germinates
Three enemies: moisture, heat, light. In that order.
- Paper first, then airtight. Put fully dry seed in labelled paper envelopes, then the envelopes in a sealed jar or tin. Paper alone lets humidity in; plastic alone traps any moisture the seed still holds.
- Cold and stable. A cellar, an unheated cupboard, or the back of a fridge at 4-5°C is ideal. Stability matters more than the exact temperature - a shelf that swings from 10 to 25°C ages seed faster than a steady 15°C.
- Add a desiccant if you have one. A silica gel sachet or a spoonful of dried rice in the jar takes up stray humidity.
- Label everything immediately. Name, variety if known, and the year collected. Every seed saver has a jar of anonymous brown specks; nobody plants them.
Viability varies more than people expect. As a rough guide: onion and parsnip seed is finished after about a year; peppers, sweet corn and many herbs manage two to three; beans, peas, carrots and most annual flowers give three to four; tomatoes, brassicas, cucumbers and squash often stay good for five or more. Those are ranges, not promises - storage conditions swing them either way.
Before committing a whole bed in spring, test a sample. Roll ten seeds in a damp paper towel, seal in a bag somewhere warm, and check after the number of days the variety normally needs. Seven or more sprouting means sow normally; three or four means sow thickly; none means start fresh. It takes a week and saves an entire growing season.
A realistic first year
Do not try to save everything. Pick three or four plants you actually liked this summer, mark the best specimens now, bag two heads each, and see the process through to a labelled jar. Next spring you will find out which of your envelopes were worth the effort, and that is the only feedback that teaches this properly.
If you are planning what those beds become next year, our fall garden checklist covers what else needs doing while the seed dries.
🛒 Recommended Gear on Amazon
- Seed envelopes - browse current options and reviews on Amazon.
- Silica gel packets - browse current options and reviews on Amazon.
- Fine mesh sieve set - browse current options and reviews on Amazon.
As an Amazon Associate, we earn from qualifying purchases - at no extra cost to you. This helps us keep producing free, in-depth guides.